Like many electronics hobbyists, I wanted a basic oscilloscope to help me troubleshoot various electronics circuits. Being a hobbyist, I couldn’t justify spending a ton of money on a scope, but I wanted something a little more capable than some of the sub $100 (USD) scopes available out there. I settled on the Siglent SDS 1202X-E Oscilloscope, which has been serving me very well for about a year now.
One of the features of the SDS 1202X-E scope is the ability to connect it to a computer via USB. Once connected, you can use the EasyScopeX utility to interact with your scope from your computer. This has several advantages:
- If your computer is closer to you on your workbench than your scope is, then you can control your scope without having to move around as much.
- If you want to capture screenshots or video of your scope’s display, doing so with EasyScopeX is pretty easy.
- There are advanced features, such as being able to send a set of commands to your scope remotely.
This article provides step-by-step instructions for setting this up.
Step 1: Install the Drivers
Before you install the EasyScopeX software, you’ll first need to install the National Instruments NI-VISA software. This software provides the drivers necessary to allow EasyScopeX to communicate with your scope over USB. I recommend selecting the Install Offline option.

Once downloaded, run the executable and follow the prompts as shown below…

Accept the license and click Next.

You might be asked to disable Windows fast startup, depending on which operating system you are running.

Review and click Next.

The NI Package Manager is installed. Click Next when done.

All we need for our purposes is the NI-VISA .NET Runtime. Uncheck all other options and click Next.

Again, accept the license agreement and click Next.

Review and click Next.

Click Yes if you want to have the NI Update Service check for updates periodically.

Finally, reboot your system before continuing.
Step 2: Install EasyScopeX
Next, you need to download the EasyScopeX installation package from the Siglent Firmware and Software Downloads page. Locate and download the latest version of EasyScopeX.

Extract the downloaded ZIP file, run EasyScopeX_setup.exe, and follow the prompts as shown below…

Select an installation folder and click Next.

Select the Start menu folder and click Next.

Decide if you want a desktop shortcut and click Next.

Review and click Install.

Click Finish.
Step 3: Connect to Your Scope
If you haven’t already connected your Siglent Oscilloscope to your computer via a USB cable, do so now.
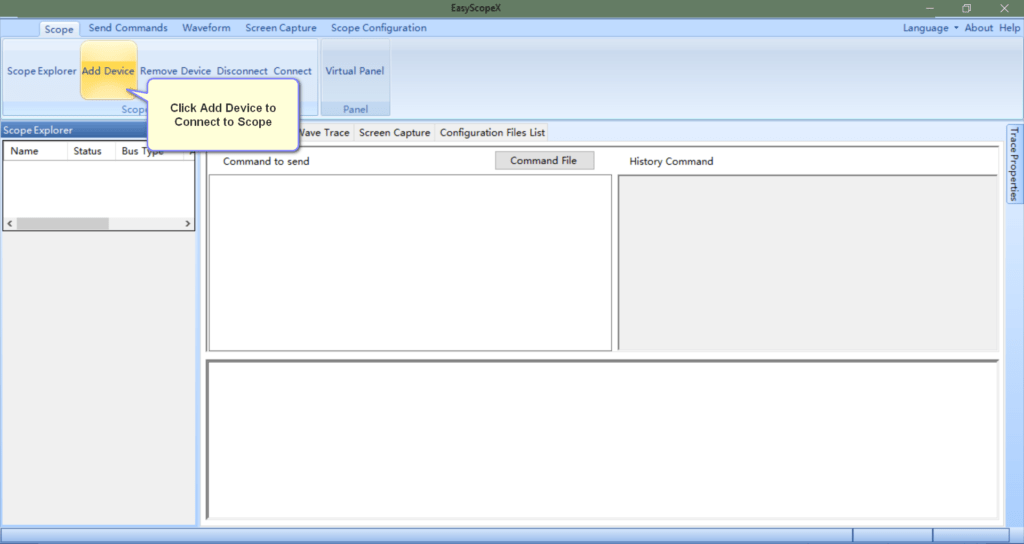
In EasyScopeX, click Add Device to connect to your Siglent Oscilloscope.

Assuming everything is working correctly, you should see your scope show up in the USBTMC tab. If you don’t see your scope, click Refresh. Finally, select your scope and click OK.

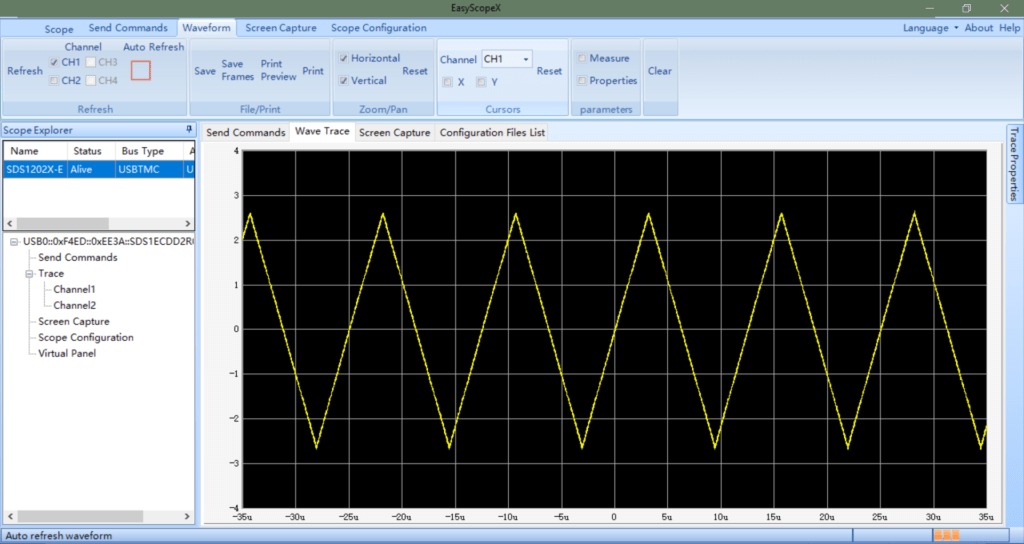
Once selected, click on the Wave Trace tab and you will see whatever is currently on your scope’s screen. You can click on the Auto Refresh option to have the EasyScopeX screen continually refresh to mirror your scope’s screen.
In the screenshot below, I had my scope connected to a function generator that was spitting out a simple triangle wave pattern.

At this point, everything is connected and working!
Summary
If you want to interact with your scope from your PC, EasyScopeX is a great solution. There is a decent amount of functionality provided by EasyScopeX that I am not going to get into within this article. I will save that for a future post. In the meantime, have fun exploring!
Thanks!
